Category Archives: Uncategorized

12 Signs You Need Water Heater Repair

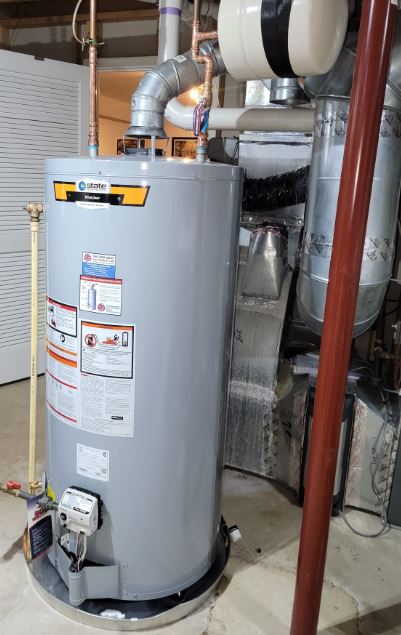
A water heater

Fun fact: There is perhaps no device on earth that can function flawlessly forever – none! 

Take your car, for example. There must have been at least one instance where it has broken down unexpectedly, leaving you stranded, hasn’t it?

Such instances make you regret disregarding the signs and symptoms that you clearly saw coming.

Similar is the case with water heaters.

A problematic water heater doesn’t ring any alarm bells…until you have to take a shower with freezing water. However, there are specific signs that point to the impending water heater problem.

Let’s face it: Your water heater operates nonstop every day of the year. So, it should be no surprise that it will eventually fail, given the increased strain it must withstand.

When all of your taps supply only cold water, it immediately dawns on you how precious this man-made invention really is.

So, to keep your water heater in tip-top shape, you need to recognize all the wear-and-tear signs.

But before that, let us explain why water heater repairs are essential.

Water Heater Repairs: Why Do You Need Them?

Cold water isn’t the only reason you should be worried about repairing your water heater.

There are a couple of more compelling arguments for why you shouldn’t put off water heater repairs.

1.    A Broken Water Heater Can Be Dangerous

Repairing your water heater may not be on top of your to-do list; however, you can easily lose control of the situation and jeopardize your safety.

But how?

Well, water heaters need both power and water. Now for well-functioning heaters, this is no issue at all.

However, if things take a turn for the worse and both of these come into contact, it can lead to some serious safety hazards (including a full-blown fire)

So, if you ever notice any water leakage, the need for repair becomes an emergency.

Other than the more serious risks, water leaks can also harm the surrounding surfaces and damage any nearby items. This is because even a tiny leak can foster the growth of mold and mildew.

2.    Prolong The Life Of Your Water Heater

If your water heater has ever made banging or knocking noises, this is probably a sign that you need to get it flushed.

The loose minerals in the water allow the sediments to settle on the bottom. So, when you delay periodic repairs, even minor issues like dirt accumulation and worn-out parts can suddenly become a hassle.

These problems can accumulate over time and greatly increase the likelihood that your water heater will soon malfunction.

So, ensuring regular repairs might help your water heater last longer.

3.    Save Cash

It’s common sense that a struggling water heater cannot operate as efficiently as a well-maintained one.

This means that if your water heater needs maintenance or repairs, it will struggle to provide the hot water you need and put undue strain on the system.

Now, what does this translate into?

Sky-high electricity bills!

Simply put, a struggling water heater leads to a drastic increase in the water heating duration, making your power expenses shoot up!

Needless to say, don’t neglect your water heater issues if you want to save some bucks.

4.    Conserve Water

When your water heater is not running properly, it results in a lot of water wastage.

Try to recall: how frequently have you left the faucet or shower running (and running…) while waiting for the water to warm up?

This is inefficient, and you should be more mindful of using only the required amount of water, especially with droughts and water shortages in so many parts of the world.

The good news is that some simple repairs are all you need to avoid negligence on your part.

12 Signs You Need Water Heater Repair

Water heaters are generally designed to last many years because they are usually subjected to heavy use.

Even so, if they are not properly repaired or maintained, they won’t last nearly as long.

And now that you know why water heater repairs are not to be taken lightly, let us help you by sharing 12 signs that your water heater needs repair.

1.    Fluctuating Water Temperatures

Even though constantly changing temperatures are the clearest indication that your water heater needs immediate repairs, many people are still unaware that it might be a sign of trouble.

So, if you are constantly turning on the taps in your home, but the water takes ages to heat up or just doesn’t provide hot water, it’s time to have some repairs done.

Also, try to recall when you purchased your water heater.

This is important because you can get it fixed if it’s still reasonably fresh, but if it’s too old, it would be preferable to get a new one.

This way, you won’t have to fix the appliance continuously, saving you time, money, and agony.

But what causes the fluctuating temperatures?

Well, the buildup of mineral deposits might be to blame.

As we mentioned, your water heating elements become covered with mineral deposits over time, preventing them from functioning optimally.

If some buildup is your only issue, you can get away with having the water elements repaired instead of purchasing a brand-new water heating system.

2.    Strange Noises

Most home appliances start making strange noises when they need repairs, and your water heater is no exception.

As the heating system ages, a light hum from your heater can gradually develop into rumbling noises, and many people start believing that their water heater will soon burst.

But don’t worry, this isn’t really the case.

If your water heater makes a little noise, that’s completely normal. However, you have good reason to be concerned if your water heater starts to make loud pounding, squeaking, or cracking sounds.

To determine the exact problem, you should contact professionals to examine your water heater.

But just to give you a general idea, the most common reason a water heater becomes noisy is, again, an excessive buildup of dirt inside the tanks and on the heating elements.

There may also be other reasons, such as a broken dip tube.

It’s crucial to get the necessary repairs done because excessive noise might weaken your water heater’s structure and cause it to start leaking. If that happens, you may have to bid farewell to your current water heater and invest in a new one.

However, if yours hasn’t yet started leaking, you can ask the plumber to thoroughly flush the water out and clean the heater’s interior.

This should make your water heater stop making noises and allow it to function normally.

3.    Water Leaks

Your water heater’s structure can deteriorate for multiple reasons besides noise, which can eventually lead to leaks and water accumulation at the bottom of the tank.

As a general rule, it’s common for your water heater to periodically display some condensation on the outside depending upon the water’s temperature.

However, the pressure relief valve should be the only place where water should exit from a water heater in a greater quantity. If you notice water dripping from anywhere else, it could indicate major issues with the appliance.

You shouldn’t take this lightly, as water leaks can be highly dangerous, especially if children, pets, or other electrical equipment are nearby.

If you notice water trickling down the side of the appliance or a pool of water at the base, it should certainly ring some alarm bells.

4.    Rusty Or Discolored Water

Rust-colored water clearly indicates something is wrong and may signal an issue inside the water tank.

The water not only looks bad but can also pose several health risks to you and your family. You can develop skin issues, and if you drink it, you may also encounter other health problems.

Cloudy water may also potentially indicate a problem with your water heater. If you have doubts, pour some water into a transparent glass and examine it. Also, sniff it to see if you recognize any metallic smells.

But what results in discolored water from your water heater?

Well, the pole inside the water heater is made of metal; over time, these metals can oxidize and result in rusty water flow. However, it is possible that the issue lies with the pipes rather than the water heater.

It’s best to contact a professional for repairs. They will inspect the problem and recommend repairs that will prevent further harm.

5.    Corrosion

Rusty water isn’t the only sign of corrosion in your water heater.

Oftentimes, corrosion is also visible on the outside of your water heater. You might even observe that the metal components of your appliance will be considerably weaker and more prone to developing leaks.

If corrosion has deteriorated your water heater to the point that it is beginning to split and leak, you will need to replace it entirely.

But what if the corrosion is not fully spread?

Well, some people replace the heat exchanger and other rusted elements to get the heater functioning. However, this is merely a short-term fix.

Water heaters only last so long. So, if you want to get more use out of them, it is crucial that you have them repaired, maintained, and cleaned on a regular basis.

6.    Unpleasant Taste Or Smell

Apart from the color, the water from your water heater can also taste and smell bad.

This is most likely because your water tank’s interior covering is flaking off.  

Any foul odor/taste is not a good sign, as these grit and flakes can seriously put your health at risk, so you should fix your water heater as soon as possible.

7.    Reduced Hot Water Pressure

A buildup of minerals, rust, or other sediments in the tank, outlets, and pipes connected to your water heater can commonly result in low hot water pressure.

This is because when the hot water lines from your heater to your outlets get increasingly clogged and restricted, it results in lower hot water pressure once the hot water reaches the outlet.

The problem can also result from a damaged circulator pump. Additionally, an old water heater might also be the cause of the reduced pressure.

The right way to approach this problem would be to reach out to a professional plumber. They will have the right tools to quickly inspect the water heater’s tanks, connections, and pipes and come up with a feasible solution.

8.    Lukewarm Water

If you suddenly find yourself forced to take lukewarm showers in the morning instead of hot showers, your water heater may need some attention.

Now, there may also be other fixable issues that can make your water heater only produce lukewarm water rather than hot water.

For instance, you may have altered your water heater’s settings to vacation mode or a lower temperature.

It’s also possible that your water heater may warm the water more slowly than usual if the outside temperature is very chilly or if your hot water consumption has sharply gone up.

However, if none of these conditions apply and you still only get lukewarm water, it’s possible that your water heater needs to be inspected.

9.    Sludgy Or Sandy Water

If you notice sandy water coming out of your tap, your water heater might be to blame.

It is typically a sign of debris buildup in the bottom of your water tank, which should be addressed immediately as muddy water is not safe for consumption.

One reason for the sediment gathering in the pipes is because of fractures in the line that enable dirt to get through. It’s better if you don’t try to remove the sediment yourself because doing so frequently results in homeowners breaking their water heaters.

Try to get in touch with a professional who is more qualified than you to handle the situation.

10. You Rarely Get Enough Hot Water

Your water heater is built so that it can provide a constant hot water supply.

It features two heating elements; one is located at the bottom and the other at the top.

Water heats up by conventional currents, so the lower element handles the majority of the heating. As a result, cold water sinks to the bottom while hot water rises to the top.

Meanwhile, to keep the water at a steady temperature, the element at the top only turns on occasionally.

So, when the lower element becomes damaged, there will be a pronounced decrease in the volume of hot water your water heater produces.

This makes one thing clear: if you frequently run out of hot water, one of your water heating elements (probably the lower element) may not be functioning properly, and your water heater needs repairs.

11. Your Water Heater Is Discharging VERY Hot Water

Now this one may sound a bit counter-intuitive, but hear us out.

Sometimes, extremely hot water can also signal that your water heater needs some repairs.

Some common reasons your water may be scalding hot are a malfunctioning thermostat, a jammed pressure relief valve, or a failing heating element.

As important as a heating element is for a properly-functioning water heater—as we already mentioned above—it can sometimes also break down.

A heating element that starts failing will stay on constantly and lead to overheating, resulting in excruciatingly hot water.

Eventually, the heating element will burn itself out completely. Then, until the element is replaced, you probably won’t have any hot water at all.

12. Your Water Heater Is Simply Old

Yes, this is also an obvious (though neglected) sign that your water heater may need more fixing and repairs than a water heater that has just been launched.

A water heater typically lasts between 5 to 10 years before needing to be replaced.

But once your water heater has been in use for over 5 years, you can anticipate it to start acting up.

So, you should schedule routine appointments with a licensed plumber for water heater repairs.

Timely and appropriate repairs might make your water heater survive up to 15 years.

To determine how old your heater is, you can simply look up your water heater’s model on the company website.

Parting Thoughts

Water heaters are truly a blessing…but there’s a small catch.

As with most modern devices, to reap the benefits of your water heater, you must invest in its upkeep.

So, what should you do to keep your water heater functioning as good as new?

Well, you should watch out for anything irregular from strange noises to unpleasant smells to even very hot water!

After all, a well-maintained water heater keeps you at ease and also saves you extra costs.

Looking for credible water heater repair professionals in Stafford, Fredericksburg, and Spotsylvania?

Well, then get in touch with OHA Plumbing right away. We’ll take care of all your water heater problems.

Call now!

Emergency Main Drain Cleaning: Essential Steps to Quickly Unclog Your Drains

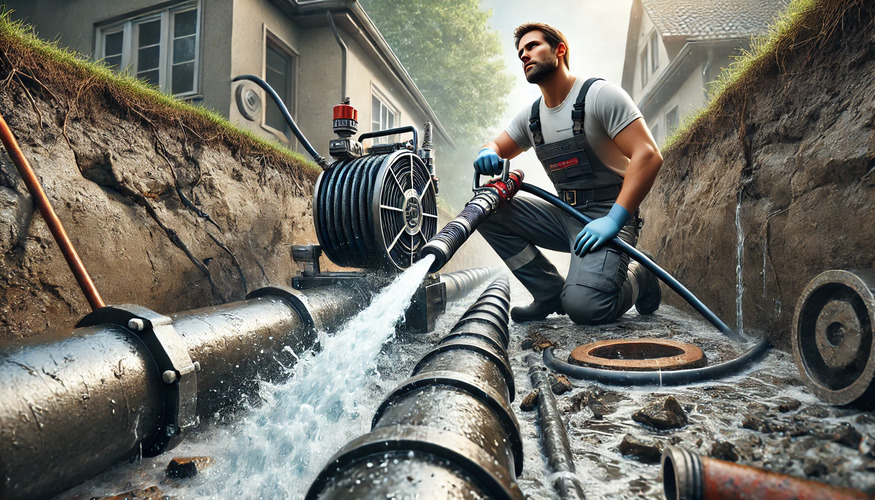
Drain cleaning

Understanding the Importance of Main Drain Cleaning

A clogged main drain can quickly escalate from a minor inconvenience to a full-blown plumbing emergency. If you’ve ever experienced water backing up into your home, you know how critical it is to resolve the issue fast. When faced with such a situation, an emergency main drain cleaning is crucial to prevent severe damage. In this guide, we’ll explore the key steps to take during a main drain emergency and why turning to professional services is often the best course of action.

What is a Main Drain?

Your main drain is the lifeline of your home’s plumbing system. It carries wastewater from all your household drains to the municipal sewer line or your septic system. When this vital drain becomes clogged, the consequences can be dire, including sewage backups, flooding, and extensive water damage.

Why Clogs Happen

Main drain clogs don’t occur out of nowhere; they build up over time. Common causes include:

  • Grease and Fat: These substances can solidify inside the pipes, gradually creating a blockage.
  • Foreign Objects: Items like paper towels, wipes, and even small toys can obstruct the flow if they end up in the drain.
  • Tree Roots: Roots from nearby trees can invade the main drain, particularly if the pipes are old or have cracks.
  • Aging Pipes: As pipes get older, they become more prone to damage and blockages as they deteriorate over time.

Consequences of Ignoring a Clog

Failing to address a clogged main drain immediately can lead to serious issues:

  • Sewage Backup: Wastewater can back up into your home, creating unsanitary conditions and unpleasant odors.
  • Flooding: A severe clog can cause flooding, leading to costly repairs and potential health hazards.
  • Increased Repair Costs: The longer a clog goes untreated, the more significant and costly the required repairs can become.

Signs of a Main Drain Clog

Spotting the early signs of a main drain clog can prevent a potential plumbing disaster.

Here’s what to look out for:

Slow Drains

If you notice water draining slowly from your sinks, bathtubs, or showers, it may be a strong signal that your main drain is partially blocked. This is typically the earliest sign that a problem is beginning to develop.

Gurgling Sounds

Gurgling noises coming from your drains are another red flag. These sounds occur when air is trapped in the pipes due to a blockage, causing water to bubble as it tries to flow through.

Water Backup

One of the most alarming signs of a main drain clog is water backing up into the lowest plumbing fixtures in your home, such as basement drains. This indicates a significant blockage that needs immediate attention.

Foul Odors

Persistent sewage odors in your home are a clear indication of a serious blockage in the main drain. If you notice these smells, it’s crucial to act quickly to prevent further complications.

Immediate Steps to Take During an Emergency

When you first notice signs of a main drain clog, quick action is essential. Here’s what you should do:

Stop Using Water

Immediately stop using water throughout your home. This includes turning off faucets, avoiding the use of toilets, and refraining from running appliances that require water. Continuing to use water will increase the pressure on the blockage, potentially worsening the situation.

Locate the Cleanout Pipe

If you’re familiar with your home’s plumbing, locate the main drain cleanout pipe. This pipe is usually found in the basement, crawl space, or outside your home and provides direct access to the main drain. However, if you’re unsure or uncomfortable with this, it’s best to skip this step and contact a professional.

Assess the Situation

While it’s important to assess the severity of the blockage, it’s even more crucial not to attempt any DIY fixes if you’re unsure. A severe clog can require specialized equipment and expertise to resolve properly. If you notice multiple drains being affected or significant water backup, it’s time to call in the experts.

The Importance of Professional Emergency Main Drain Cleaning

Although some minor plumbing problems can be handled with DIY techniques, emergency main drain cleaning is not one of them. Here’s why professional help is often the best solution:

Expertise and Experience

Professional plumbers have the specialized skills and extensive experience required to effectively handle even the most challenging main drain clogs. They know how to assess the situation accurately and determine the best course of action. Whether it’s using a drain snake, hydro jetting, or another method, professionals have the knowledge to fix the problem efficiently and safely.

Advanced Equipment

Plumbers have access to advanced tools that aren’t available to the average homeowner. Techniques like hydro jetting, which uses high-pressure water to clear blockages, require specialized equipment that only professionals can operate. These tools ensure the job is done thoroughly, reducing the risk of future clogs.

Preventing Further Damage

Attempting to clear a main drain clog on your own can sometimes do more harm than good. Without the right tools and knowledge, you could accidentally damage your pipes, resulting in even more costly repairs. Professionals can address the issue without causing additional harm to your plumbing system.

Quick and Efficient Service

When facing a plumbing emergency, every moment counts. Professional plumbers can respond quickly to your call, assess the situation, and take immediate action to resolve the problem. This swift response can prevent the clog from causing further damage to your home.

Preventing Future Main Drain Clogs

After dealing with a main drain clog, it’s natural to want to prevent it from happening again. Here’s how professional maintenance can help:

Regular Professional Maintenance

One of the best ways to prevent future clogs is by scheduling regular maintenance with a professional plumber. They can inspect your main drain, identify any potential issues, and clean the pipes before a clog forms. Regular maintenance is a proactive way to keep your plumbing system in top shape.

Proper Waste Disposal Education

A professional plumber can offer essential guidance on proper waste disposal practices. They can educate you on what should and shouldn’t go down the drain, helping to prevent future blockages caused by improper disposal of grease, fat, or foreign objects.

Tree Root Management

If tree roots have been a problem in the past, a professional plumber can recommend solutions, such as root barriers or regular rooter services. Managing tree roots is crucial for preventing them from invading your main drain and causing blockages.

Installing a Backwater Valve

For homes prone to flooding or sewage backup, a professional plumber can install a backwater valve. This device stops sewage from backing up into your home and provide an extra layer of protection against future clogs and backups.

When to Call in the Experts

Plumbing issues vary in severity, and some cases require the specialized attention of a professional. Here’s when to call a plumber for emergency main drain cleaning:

Signs It’s Time to Call a Plumber

If you’ve noticed multiple signs of a main drain clog, such as water backup, slow drains, or foul odors, it’s time to call a professional. Persistent or recurring issues also indicate that the problem is beyond DIY fixes and requires expert intervention.

Choosing the Right Plumber

When selecting a plumber, look for someone with experience in emergency main drain cleaning. Verify their qualifications, go through reviews, and seek recommendations to ensure you’re choosing a reliable and trustworthy professional.

Emergency Plumbing Services

Main drain clogs don’t always happen during regular business hours, which is why it’s important to choose a plumber who offers emergency services. This ensures you can get help whenever you need it, day or night.

When dealing with an emergency main drain clog, prompt action and professional assistance are crucial to safeguarding your home from significant damage. Although a DIY approach might seem appealing, the potential risks usually outweigh the advantages. Professional plumbers bring the necessary expertise, tools, and experience to efficiently and safely address even the most persistent clogs

Opting for professional emergency main drain cleaning ensures a swift resolution, minimizing the chances of additional issues. Plus, by heeding your plumber’s advice, you can implement preventive measures to prevent future clogs and keep your home’s plumbing system in excellent working order.

Don’t wait until a minor clog turns into a major disaster. If you suspect a main drain issue, contact a professional plumber today. Emergency main drain cleaning is just a call away, and it’s the best step you can take to protect your home and ensure peace of mind.

Trust OHA Plumbing for Your Emergency Main Drain Cleaning Needs

Our licensed and experienced plumbing technicians have been proudly serving residents of Fredericksburg, Stafford, King George, Spotsylvania, Lake of the Woods, Thornburg, and Ladysmith, VA, since 1995. At OHA Plumbing, we anchor our services in the values of honesty, quality, reliability, and dependability. When you require expert assistance with emergency main drain cleaning, you can count on us to provide quick and efficient solutions that safeguard your home and bring you peace of mind.

Don’t let a clogged main drain disrupt your life. Contact OHA Plumbing today for professional service you can count on. Call us at (703) 459-9101 for Northern VA and (540) 425-3307  for rest of VA or visit our website to schedule your service now. We’re here to ensure your home’s plumbing runs smoothly.

Drain cleaner

Frequently Asked Questions (FAQ)

1. What should I do if I suspect my main drain is clogged?

If you think your main drain is clogged, it’s crucial to stop using water immediately to avoid worsening the backup. Reach out to OHA Plumbing without delay. Our skilled technicians will promptly evaluate the situation and offer the most effective solution to clear the blockage and protect your home from damage.

2. How can I tell if the main drain is the problem?

Indicators that your main drain might be clogged include slow drainage in multiple fixtures, gurgling sounds from drains, water backing up in lower-level plumbing fixtures, and persistent foul odors. If you notice any of these signs, it’s time to call OHA Plumbing for a professional inspection and emergency main drain cleaning.

3. Why is it better to hire a professional for main drain cleaning?

Hiring a professional for main drain cleaning ensures the job is done safely and effectively. Our licensed plumbers at OHA Plumbing have the expertise and specialized equipment to handle even the most stubborn clogs. Attempting a DIY solution can sometimes worsen the problem or cause damage to your pipes.

4. Can regular maintenance help prevent main drain clogs?

Yes, regular maintenance is key to preventing main drain clogs. At OHA Plumbing, we offer preventive maintenance services that include thorough inspections and cleaning to keep your drains clear and your plumbing system functioning efficiently. This proactive strategy can help you avoid expensive repairs in the future.

5. What areas do you serve for emergency plumbing services?

OHA Plumbing proudly serves residents in Fredericksburg, Stafford, King George, Spotsylvania, Lake of the Woods, Thornburg, and Ladysmith, VA. If you’re experiencing a plumbing emergency, our team is ready to respond quickly with the reliable service you need. If you have any other questions or need more information, don’t hesitate to contact us. We’re here to help with all your plumbing needs!

How to Choose A New AC Unit for Your Home

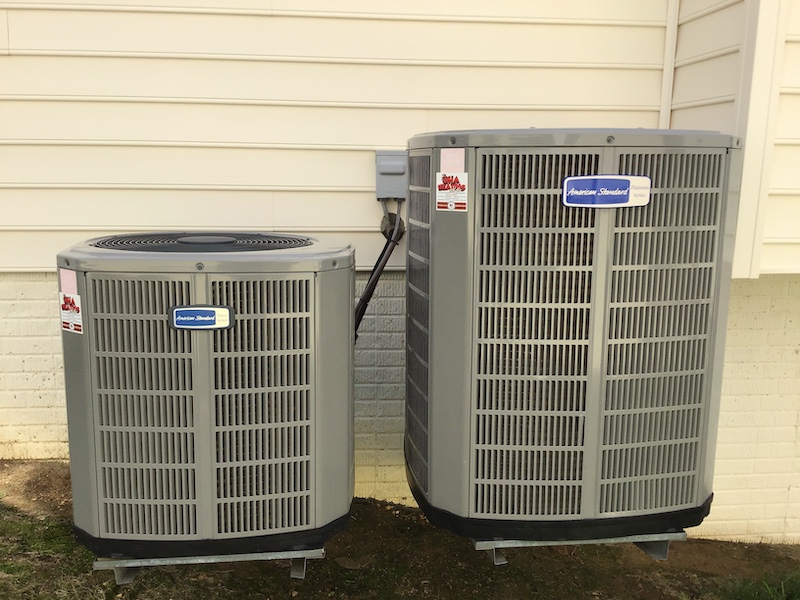
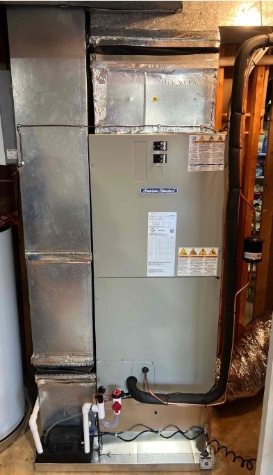
Two new ACs.

Buying an AC Unit?

Air conditioning is a necessity regardless of where you live. Even in areas with moderate climates all-year-round, A/C units are still essential to keeping homes cool, comfortable, and healthy. Shopping for an air conditioner can seem like a chore, especially if you don’t know how to choose a new A/C unit. Still, it’s a decision that will ultimately affect the comfort of your home, so you should not take it lightly.

Important Factors to Consider When Buying A New A/C Unit

Are you planning to purchase a new air conditioner? Here are some important factors to consider.

1. Type of Air Conditioning System

When shopping for a new air conditioner, the first question you need to ask yourself is, “What type of AC best fits my home and intended purpose?” Air conditioning units come in different shapes, sizes, and prices. Currently, there are four types of systems dominating the residential market, each type useful in its own way.

  • Central AC Unit: A central air conditioning system distributes cooled air to your home through ductwork. Compared to other A/C options, central air conditioning is the most expensive when it comes to maintenance and upfront costs. However, it is the most efficient for whole-house cooling, especially if you already have ductwork in place.
  • Ductless Mini Split: A ductless mini-split system is made up of two main components: an outdoor compressor (similar to the ones found in central A/Cs) and an air handling unit that is mounted indoors. Unlike central A/C units, ductless mini-splits are designed for cooling individual rooms or areas in the house. Most ductless A/C models have a high energy efficiency rating. They are an excellent choice for cooling homes without ductwork, or where adding ductwork isn’t feasible.
  • Window Unit: Window units are another option for keeping singular rooms cool in homes without ductwork. While they may not be as efficient as central A/Cs and a little noisy when operating, they’re lighter on the pocket. If you have budget constraints, window units could be the best choice. They are cheaper than most types of A/C and easy to install. If you’re quite the handyman, you can install them without professional help.
  • Portable Unit: If you want an A/C that you can take from room to room, then a portable unit is your best (and only) bet. These units are almost similar to window-type A/Cs, except that they stand on the floor. Portable units are suitable for homes with limited space, like apartments and condominiums. They may not be as efficient as the first three options, but they’re quite effective in cooling smaller rooms and spaces. 

2. Size

Bigger isn’t always better as far as air conditioning units are concerned. An oversized A/C is not only inefficient, but it may also fail to properly remove humidity from the room and make it feel uncomfortable. On the other hand, a unit that’s too small will end up struggling to keep up with your home’s cooling needs.

However, determining the right tonnage on your own might be a little tricky as this will depend on a variety of factors including the local climate, size of the room, size of your windows, and your home’s orientation to the sun. A trained A/C technician can help you choose the best size for your home.

3. Energy-efficiency

After deciding on the type and size of your air conditioner, it’s time to look at energy efficiency. An A/C unit’s energy efficiency is measured using SEER or seasonal energy efficiency rating.

Federal regulations require A/C units to have a SEER no lower than 14. Some newer A/C models have a SEER of 22 or higher.

The higher the SEER, the lower the energy consumption and operational costs.  But while choosing a more efficient unit can save you more money in the long run, a higher SEER usually means more expensive upfront and installation costs.

4. Additional Features

A/C units are not created equal. If you’ve already looked into possible options, then you know that others, especially the latest models, are loaded with features. Going for an air conditioner with a smart thermostat, fan-only option, and or auto-delay switch can help you make cooling your home more convenient while keeping your energy bills low.

Choosing A Contractor

Everybody expects a new air conditioner to work perfectly. Unfortunately, that is not always the case. Many A/C units suffer from efficiency problems and shortened life spans due to improper installation.

Is it time to replace your air conditioner? Choose a reputable HVAC contractor to ensure that you get quality work that will last. The best contractors explain to you the process in an easy-to-understand way and help you make informed, budget-saving decisions.

Buying a new A/C unit can be overwhelming, but if you do your homework, you’ll be able to get the right unit at the right price. If you’re currently searching for the right option, our team can be there to help.

Give us a call at 703-213-5161 to learn more about the services we can provide.

Affordable Heating Repair Tips: How to Slash Your Bills!

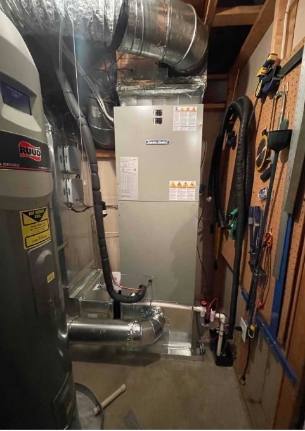
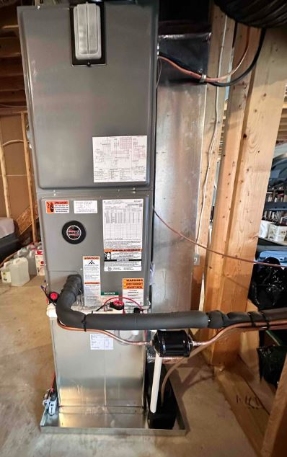
A heating system

Affordable Options for Heating

As the chilly season rolls in, the last thing anyone wants is a hefty bill for a heating repair. Don’t fret! We’ve got your back with some savvy tips to keep those costs down without sacrificing warmth and comfort. In this guide, we’ll navigate the ins and outs of affordable heating repair. From understanding the quirks of your heating system to smart maintenance and repair choices, we’ll equip you with the knowledge to make those cold months more bearable and less costly. Let’s embark on this journey to ensure your home stays cozy and your wallet remains full.

Understanding Your Heating System

First things first, let’s get familiar with your heating system. Whether it’s a furnace, a boiler, or a heat pump, each system has its quirks. Knowing what you’re dealing with is key. A strange noise or a sudden chill can signify something amiss. We’ll help you decode these signals so you’re never left out in the cold. Understanding your heating system is crucial to efficient and effective heating repair. Let’s break down the common types:

Furnaces: The workhorses of many homes, furnaces push hot air through ducts. They can be powered by electricity, natural gas, or fuel oil. Common issues include faulty thermostats, dirty filters, and ignition problems. If your furnace is blowing cold air or making unusual noises, it’s a signal to investigate.

Boilers: These heat water and provide either hot water or steam for heating. Boilers are typically powered by natural gas, oil, or electricity. Signs of trouble include leaking water, strange banging sounds, or uneven heating. Regular maintenance checks on the pressure gauge and valves are a must.

Heat Pumps: Acting as both heaters and air conditioners, heat pumps are energy-efficient alternatives. They move heat from the air, ground, or water outside into your home. Common issues include freezing outdoor units, strange noises, and efficiency drops. Regular cleaning of filters and checking for adequate airflow are essential preventive steps.

Each system requires a unique approach to maintenance and repair. By understanding the basics of your heating system, you’re better equipped to recognize the early signs of trouble and address them promptly. This ensures a warmer, more comfortable home and saves you money by preventing minor issues from escalating into major repairs.

Preventative Maintenance: The First Step to Affordability

The secret to dodging those hefty heating repair bills? You guessed it – regular maintenance. Think of it as your heating system’s equivalent of a car tune-up. This not only ensures efficient operation but also prolongs the life of your system. Let’s break down some key preventative steps:

Regular Filter Checks and Replacements

This is a big one. Dirty or clogged filters are the archenemies of efficient heating. They force your system to work harder, increasing wear and tear. How often should you change them? Typically, every 1-3 months, but check your system’s manual for specific recommendations. This simple step can drastically improve airflow and efficiency.

Thermostat Calibration

Your thermostat is the brain of your heating system. Ensuring it’s accurately calibrated can make a world of difference. An improperly calibrated thermostat can lead to over or under-heating, causing unnecessary strain on your system. It’s a good idea to check it seasonally, especially before the heavy heating period kicks in.

Cleaning and Inspection

Regularly inspecting and cleaning key components of your heating system can catch small problems before they escalate. This includes checking for any unusual noises or smells, inspecting the heating vents for blockages, and ensuring the exterior of your furnace or heat pump is clean and clear of debris. But, be careful not to damage any components or to deal with any electrical, gas, or other fuel sources.  Leave anything you have questions about to a professional.

Professional Annual Check-Ups

Consider this a yearly health check for your heating system. A professional technician can spot issues you might miss, perform more complex maintenance tasks, and ensure your system is operating at peak efficiency. They can also provide expert advice tailored to your system and usage patterns.

Educate Yourself

Familiarize yourself with the basic operations of your heating system. Understanding how your system works can help you identify potential issues early and communicate more effectively with professionals when needed. Plus, knowing more about the equipment that keeps your home warm and cozy is empowering!

Incorporating these preventative maintenance steps into your routine can significantly reduce the likelihood of unexpected breakdowns and costly emergency repairs. Not only does it save you money in the short term, but it also contributes to your heating system’s longevity and overall health. A little effort goes a long way in ensuring your system is efficient, reliable, and ready to keep you warm through the winter months.

Identifying and Troubleshooting Common Problems

Playing detective with your heating system doesn’t require a magnifying glass, just a keen eye and ear. Common heating issues often have simple solutions, but it’s crucial to know when a problem is beyond a DIY fix and when it’s time to call in the professionals. Let’s explore some typical problems and their troubleshooting steps:

Uneven Heating

If some rooms are colder than others, it might be a sign of blocked air vents or duct issues. Check for any obstructions in your vents and ensure they’re open and unblocked. Also, consider if your ductwork needs cleaning – a task best left to professionals.

Strange Noises

Banging, whistling, or rattling sounds are not the symphony you want from your heating system. Loose parts, air in the system, or a malfunctioning burner could be the culprits. Tightening loose components might solve the issue, but it’s time to consult a technician if the noises persist.

Thermostat Issues

If your thermostat is acting up, it can lead to heating inefficiencies. Ensure it’s set correctly and not accidentally switched to cooling mode. Sometimes, replacing or resetting the batteries can bring it back to normal operation.

Ignition or Pilot Control Problems

These can be tricky and involve components like igniters or pilot lights. If your system struggles to ignite, it could be due to a faulty pilot light or an electrical issue. Basic visual checks of the system are fine, but for more complex issues, a professional should handle it.

Frequent Cycling

If your heater is constantly turning on and off, it could be due to an oversized system, a faulty thermostat, or a clogged filter. Replacing the filter is a simple fix. However, if the issue persists, getting a professional opinion is best.

No Heat Production

First, check the basics – is your system turned on, and is the thermostat set correctly? If all seems in order, but there’s still no heat, the issue could be with the gas supply, pilot light, or the heating elements themselves. These issues typically require a professional’s touch.

Yellow Pilot Light

Your furnace’s pilot light should be blue. If it’s yellow, it indicates a ventilation problem, which could be dangerous. This is a situation where you should immediately turn off your system and call a heating repair professional.

Remember, while some issues can be resolved with a bit of DIY, others indicate more severe problems requiring professional attention. It’s important to err on the side of caution, especially when dealing with complex systems like your home heating. Regular maintenance and timely repairs not only ensure your comfort but also your safety. Stay warm, stay safe, and don’t hesitate to call the experts when in doubt!

Heater

DIY vs. Professional Repairs: Making the Right Choice

Navigating the world of heating repair can sometimes feel like walking a tightrope between DIY and professional help. Knowing when to roll up your sleeves and dial the pros is crucial for your safety and the longevity of your heating system. Let’s break down the difference:

What You Can Safely DIY:

  • Filter Replacement: This is a simple yet essential task. Regularly changing your heating system’s filters can improve efficiency and is a straightforward process typically outlined in your system’s manual.
  • Thermostat Troubleshooting: Issues like checking battery life, ensuring correct settings, or even resetting the thermostat are within the DIY realm.
  • Basic Cleaning: Regularly cleaning around your heating system, ensuring vents are dust-free and clear of debris, is a great way to maintain it.

When to Call in the Pros:

Persistent Problems: If an issue persists despite your best DIY efforts, it’s time to call in the experts. Recurring problems often indicate underlying issues that require professional diagnosis and repair.

Electrical Issues: Any problem that involves electrical components is a signal to stop and call a technician. This includes issues with wiring or electrical connections within your heating system.

Gas Leaks or Smells: If you smell gas or suspect a leak, it’s a clear sign to call professionals immediately. Gas leaks are dangerous and require urgent attention from experienced technicians.

Major Component Repairs: Repairing or replacing major parts like heat exchangers, motors, or burners is not a DIY job. These require specific tools and expertise.

The Benefits of Professional Repairs:

  • Expert Diagnosis: A trained technician can quickly identify and efficiently resolve issues that might take you much longer to diagnose and may not be able to fix.
  • Safety: Professionals have the training and tools to handle repairs safely, especially important with gas or electrical systems.
  • Warranty and Longevity: Professional repairs often come with warranties, ensuring that it will be taken care of if the issue reoccurs. Plus, correctly repaired systems tend to have a longer lifespan.

Cost Considerations:

  • Short-Term vs. Long-Term Costs: While DIY might seem cheaper in the short term, incorrect repairs can lead to more significant problems, leading to more expensive repairs down the line.
  • Preventative Maintenance Contracts: Many heating repair companies offer maintenance contracts, which might be a cost-effective way to ensure professionals regularly service your system.

While there are aspects of heating repair that are suitable for DIY, understanding the limits of your skills and the complexity of your system is crucial. When in doubt, leaning on professional expertise is often the safest and most cost-effective choice. Remember, the goal is not to fix a problem temporarily but rather to ensure your heating system operates safely and efficiently for as long as possible.

How to Find Affordable Repair Services

When your heating system calls for a professional touch, the challenge often lies in finding a service that’s both reliable and affordable. Fear not! We’ve compiled some tried-and-true strategies to help you find the best value for your heating repair needs. Let’s dive in:

Start with Research

  • Online Reviews and Ratings: Websites like Yelp, Google, and Angie’s List are great places to start. Look for companies with high ratings and read the reviews to understand their reliability and customer service.
  • Ask for Recommendations: Sometimes, the best leads come from friends, family, or neighbors who’ve had similar work done. Personal recommendations give you insight into the quality of work and customer experience.

Check Credentials

  • Licensing and Insurance: Ensure any company you consider is licensed and insured. This protects you in case of accidents or damage during the repair process.
  • Certifications: Look for technicians certified by reputable organizations like NATE (North American Technician Excellence). This indicates a higher level of skill and knowledge.

Ask the Right Questions

  • Inquire About Experience: How long has the company been in business? What experience do they have with your specific heating system?
  • Warranty and Guarantees: Ask about the kind of warranty or guarantee they offer on their work. This can provide peace of mind and protect your investment.

Consider Local, Family-Run Businesses

  • Personalized Service: Smaller, locally-owned businesses often provide more personalized service and may be more willing to negotiate on price.
  • Community Trust: Local businesses rely on community trust and word-of-mouth, so they’re typically invested in ensuring customer satisfaction.

Understand the Value of Good Service

  • Quality vs. Cost: The cheapest option isn’t always the best. Weigh the cost against the quality of service. A slightly higher investment can save you money through more durable repairs.

Look for Special Deals or Off-Season Discounts

  • Promotions and Discounts: Some companies offer seasonal discounts or promotions. Off-peak seasons like late spring or early fall might be times when you can get a better deal.
  • Energy Efficiency Rebates: Check if any rebates are available for energy-efficient repairs or upgrades. This can significantly lower your overall cost.

Finding the right heating repair service doesn’t have to drain your wallet. You can find a reputable and affordable provider by doing thorough research, asking the right questions, and understanding the value of quality service. Remember, a good repair service not only fixes the immediate problem but also contributes to your heating system’s long-term health and efficiency.

Cost-Saving Tips for Professional Repairs

Getting professional help for your heating repair doesn’t have to mean emptying your wallet. With the right approach and timing, you can significantly reduce the costs. Here are some insider tips to help you save money while ensuring quality repairs:

Timing Your Repairs Strategically

  • Off-Peak Seasons: Typically, heating repair services are in high demand during early winter and late fall. Scheduling your repairs during off-peak times, like spring or late summer, can often net you lower rates and faster service.
  • Regular Maintenance: Regular maintenance can prevent major breakdowns. Schedule annual or bi-annual check-ups to catch issues early, avoiding more costly repairs later.

Inquiring About Discounts and Special Offers

  • Senior, Military, or First Responder Discounts: Many companies offer discounts to seniors, military personnel, and first responders. It’s always worth asking if these apply.
  • Seasonal Promotions: Watch for seasonal promotions or special offers, particularly during the off-peak seasons.

Understanding the Scope of Work

  • Detailed Estimates: Ensure you get a detailed estimate that breaks down the cost of parts and labor. This transparency helps you understand exactly what you’re paying for.
  • Avoiding Unnecessary Repairs: Sometimes, technicians may suggest additional, non-urgent repairs. It’s okay to focus on what’s critical and schedule other repairs for later.

Exploring Service Packages:

  • Service Contracts: Some companies offer service contracts or maintenance plans that can be more cost-effective in the long run.
  • Bundled Services: If you need multiple repairs, ask if there’s a discount for bundling services together.

Asking About Warranties and Guarantees:

  • Parts and Labor Warranties: Understanding the warranty on parts and labor can save you money if there are post-repair issues.
  • Satisfaction Guarantees: Some companies offer satisfaction guarantees. This can be a safety net, ensuring you’re not paying for incomplete or subpar work.

Seeking Energy Efficiency Rebates:

  • Energy-Saving Upgrades: If your repair involves replacing parts, consider opting for energy-efficient ones. You may qualify for rebates from your local utility company or government incentives.

DIY What You Can:

  • Simple Tasks: Handle simple tasks like filter replacement or system cleaning yourself. This reduces the labor costs on professional visits.

By employing these strategies, you can manage the costs of heating repairs without compromising on the quality of the service. Remember, effective communication, understanding the scope of work, and being aware of available discounts and offers are key to finding a cost-effective solution for your heating repair needs.

Heating system

Long-Term Savings: Investing in Efficiency

When it comes to heating repair and maintenance, a forward-thinking approach focused on energy efficiency can be a game-changer for your finances and comfort. Upgrading to an energy-efficient heating system or enhancing your current system’s efficiency might require an initial investment, but the long-term savings are substantial. Let’s unpack how making this leap can benefit you in the long run:

Understanding Energy Efficiency

  • Energy-Efficient Systems: These systems are designed to use less energy to produce the same amount of heat as their less efficient counterparts. This means lower energy bills and less strain on your heating system.
  • Efficiency Ratings: Look for systems with high AFUE (Annual Fuel Utilization Efficiency) ratings for furnaces and high SEER (Seasonal Energy Efficiency Ratio) and HSPF (Heating Seasonal Performance Factor) ratings for heat pumps. The higher the rating, the more efficient the unit.

Assessing Your Current System

  • Age and Condition: Older systems generally operate at lower efficiencies. If your heating system is over 15 years old, it might be time to consider an upgrade.
  • Frequent Repairs: The costs can add up if you’re constantly calling for repairs. A new, more efficient system could reduce these repair costs significantly.

Choosing the Right System

Professional Consultation: Consult with a heating professional to determine the best energy-efficient system. They can provide insights on the most cost-effective options.

Size and Type: Choosing a system that’s appropriately sized for your home is crucial. An oversized or undersized system can be inefficient and costly.

Enhancing Efficiency of Current Systems

  • Smart Thermostats: Installing a smart thermostat can optimize your heating usage, reducing unnecessary energy expenditure.
  • Regular Maintenance: Keep your existing system well-maintained. Regular check-ups and promptly addressing minor issues can improve efficiency.

Environmental Impact

  • Reducing Carbon Footprint: By using less energy, you’re saving money and contributing to a reduction in carbon emissions, a win-win for your wallet and the planet.

Future-Proofing Your Home:

  • Increased Property Value: Homes with energy-efficient heating systems often have higher property values and appeal more to potential buyers.

Investing in energy efficiency is a smart move for long-term savings. It’s about balancing the initial costs with the future financial and environmental benefits. Upgrading to a more efficient system or enhancing your current one sets the stage for years of comfort, reduced energy bills, and a smaller carbon footprint. Remember, the most efficient heating system is one that’s properly sized, professionally installed, and regularly maintained.

Government and Manufacturer Rebates and Assistance Programs

When facing the costs of heating repair or system upgrades, it’s essential to remember that you might not be alone in this financial journey. Various government and manufacturer rebates and assistance programs can play a significant role in easing the burden. Let’s explore how you can take advantage of these opportunities and turn what feels like an expense into a savvy investment.

Understanding Rebates and Assistance Programs

  • Purpose: These programs are often designed to encourage homeowners to choose energy-efficient systems that align with environmental goals.
  • Types of Programs: They can vary from direct rebates that reduce the purchase price to tax credits that reduce your taxable income and even low-interest loan programs for home energy upgrades.

Government Rebates and Tax Credits

  • Federal Programs: The U.S. government often offers tax credits for energy-efficient home improvements. Check the ENERGY STAR website for up-to-date information on federal tax credits.
  • State and Local Programs: Many states and municipalities have additional programs. Depending on your location, these can be more specific and potentially more lucrative.

Manufacturer Discounts and Rebates

  • Energy-Efficient Models: Many manufacturers offer rebates on energy-efficient models. It’s a win-win situation; you get a discount, and they promote their energy-efficient products.
  • Seasonal Promotions: Keep an eye out for seasonal promotions, especially during off-peak seasons when manufacturers are more likely to offer discounts.

How to Find and Apply for Programs

  • Research: Start with a simple online search. Websites like the Database of State Incentives for Renewables & Efficiency (DSIRE) can be a great resource.
  • Ask the Experts: Heating repair professionals and system installers are often well-informed about current rebates and can guide you through the application process.

Application Tips

  • Documentation: Ensure you have all the necessary documentation, such as proof of purchase and installation.
  • Deadlines: Be aware of application deadlines to ensure you get all available programs.

Combining Rebates for Maximum Savings

  • Stacking Opportunities: Sometimes, you can combine federal, state, and manufacturer rebates for even more significant savings.

Eligibility Requirements

  • Energy Efficiency Ratings: Most rebates require the system or repair to meet certain energy efficiency criteria.
  • Residency: Some rebates are only available to residents of certain areas or to homeowners rather than renters.

Long-Term Benefits

  • Reduced Energy Bills: By using rebates to upgrade to more efficient systems, you’re saving on the purchase price and reducing your long-term energy costs.

Navigating the world of rebates and assistance programs can seem daunting, but it’s worth the effort. These programs are there to help make your heating repair and upgrade projects more affordable and environmentally friendly. With a bit of research and the right guidance, you can unearth savings that make your heating system repairs or upgrades a wise financial decision. Remember, keeping your heating system efficient saves money and contributes to a healthier planet.

And there we have it – your comprehensive guide to cost-effective heating repair. Armed with this knowledge and a proactive approach, you’re well-equipped to avoid unnecessary expenses and headaches. Keep cozy, make informed decisions, and let’s ensure those heating repair bills stay manageable together!

Choose OHA HVAC, Plumbing, Roofing, Chimney & Fireplaces for Top-Rated, Reliable HVAC Solutions

With over 1,000 5-star Google reviews, OHA HVAC, Plumbing, Roofing, Chimney & Fireplaces is a trusted HVAC contractor. We guarantee on-time service without the wait, transparent pricing with no hidden fees, and unwavering commitment to 100% customer satisfaction. Benefit from our flexible financing options for all credit types and assured safety with thoroughly background-checked technicians. Plus, we can resolve your issue in a single visit*. For dependable, top-quality HVAC services, turn to OHA HVAC, Plumbing, Roofing, Chimney & Fireplaces – where your comfort is our top priority.

The Ultimate Gas Fireplace Service Checklist for Homeowners

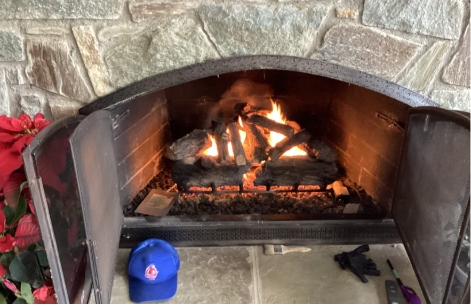
A gas fireplace

Enjoy Cozy Winter Nights

Winter nights are better with a cozy gas fireplace. The warmth, the ambiance, and the convenience make it a favorite for many homeowners. But what happens when your fireplace stops working or starts smelling strange? Regular gas fireplace service is the key to keeping your fireplace safe, efficient, and ready to warm your home.

This comprehensive guide will walk you through the ultimate gas fireplace service checklist. Whether you’re a DIY enthusiast or prefer to call in the pros, this checklist will help you maintain your fireplace like a pro.

Why This Guide Matters

Gas fireplaces are a very popular choice for their convenience and efficiency. However, they require regular maintenance to function safely and effectively. You could face issues like gas leaks, carbon monoxide poisoning, or costly repairs without proper care.

This guide is designed to help you:

  • Understand the importance of gas fireplace service.
  • Perform basic maintenance tasks yourself.
  • Know when to call a professional.
  • Spot warning signs that your fireplace needs immediate attention.

Following this checklist will ensure your fireplace is always ready to provide warmth and comfort during the coldest months.

Why Gas Fireplace Service Matters

Like any appliance, fireplaces require regular care to function safely and effectively. Without proper maintenance, you could face serious risks, higher costs, and a shorter lifespan for your fireplace. Here’s why gas fireplace service is so important:

1. Safety First

Gas fireplace uses natural gas or propane, which can be dangerous if improperly handled. Gas leaks or carbon monoxide buildup can lead to fires, explosions, or even poisoning. Regular service ensures your fireplace is safe to use.

  • Example: A family in Stafford avoided a potential disaster when their annual inspection revealed a small gas leak. The technician fixed it before it could cause any harm. The leak could have led to a fire or carbon monoxide poisoning without that inspection.
  • Stat: According to the U.S. Fire Administration, gas leaks cause thousands of home fires each year, many of which could have been prevented with regular maintenance.
  • Tip: Install a carbon monoxide detector/sensor near your fireplace. If it goes off, evacuate immediately and call a professional.

Many homeowners ask, “How often should I service my gas fireplace to prevent gas leaks?” The answer is at least once a year, ideally before the winter season.

2. Save Money

A well-maintained fireplace burns cleaner and uses less gas, which can significantly lower your energy bills. But neglecting maintenance can lead to inefficiencies that cost you more in the long run.

  • Stat: According to the U.S. Department of Energy, regular maintenance can improve fireplace efficiency by up to 30%, saving you hundreds bucks annually.
  • Example: A homeowner in Woodbridge noticed their gas bills were unusually high. After a professional inspection, they discovered a clogged burner, causing the fireplace to use more gas than necessary. Cleaning the burner restored efficiency and lowered their bills.
  • Tip: Schedule an annual cleaning of the burner and logs to prevent blockages that reduce efficiency.

If you’re wondering, “Can a gas fireplace save me money on heating bills?” the answer is yes—but only if it’s properly maintained. A well-serviced fireplace burns fuel more efficiently, reducing energy costs.

3. Longer Lifespan

Routine maintenance helps prevent costly repairs and extends the life of your fireplace. Like a car, your fireplace needs regular check-ups to keep running smoothly.

  • Example: A homeowner in Chantilly neglected their fireplace for years, skipping annual inspections and cleanings. When it finally broke down, the repair cost was over $2,000. Regular maintenance could have prevented this expense.
  • Stat: A gas fireplace can last 12-20 years with proper care. Neglecting maintenance can cut that lifespan in half.
  • Tip: Simple tasks like cleaning the glass, testing the ignition, and inspecting the vent can prevent major issues down the line.

A common question is, “How long does a gas fireplace last with proper maintenance?” With annual service, you can expect your fireplace to last up to 20 years or more.

4. Peace of Mind

Knowing your fireplace is in good working order allows you to enjoy it without worry. Regular service gives you confidence that your fireplace is safe, efficient, and ready to use whenever needed.

  • Example: A family in Manassas hosted a holiday gathering and relied on their gas fireplace to keep everyone warm. They didn’t have to worry about malfunctions or safety issues thanks to their recent service appointment.
  • Tip: Keep a maintenance log to monitor service dates and any issues your technician identifies. This can help you stay on top of repairs and avoid surprises.

If you’re asking, “Why is regular gas fireplace maintenance important?” the answer is simple: it keeps your family safe, saves you money, and ensures your fireplace is always ready to use.

5. Environmental Benefits

A well-maintained fireplace is not only good for your wallet but also for the environment. Efficient burning reduces greenhouse gas emissions and minimizes your carbon footprint.

  • Stat: Properly maintained gas fireplaces produce fewer emissions than wood-burning fireplaces, making them a more eco-friendly option.
  • Tip: Ask your technician about eco-friendly upgrades like high-efficiency burners or venting systems.

Many people wonder, “Are gas fireplaces environmentally friendly?” The answer is yes—when properly maintained, they burn cleaner and produce fewer emissions than traditional wood-burning fireplaces.

Gas fireplace service isn’t just a luxury—it’s a necessity. Regular maintenance ensures your fireplace is safe, efficient, and long-lasting, from preventing dangerous gas leaks to saving money on energy bills. Don’t wait until something goes wrong. Schedule your gas fireplace service with OHA HVAC, Plumbing, Roofing, Chimney & Fireplaces today and enjoy peace of mind all winter.

The Ultimate Gas Fireplace Service Checklist

Keeping your gas fireplace in top shape requires DIY maintenance and professional service. Follow this detailed checklist to ensure your fireplace is safe, efficient, and ready to use all year round.

Monthly Maintenance (DIY)

1. Inspect the Fireplace:

  • What to Do: Look for cracks, discoloration, or debris in the fireplace and vent.
  • Pro Tip: Use a flashlight to check hard-to-see areas, especially around the burner and vent openings.
  • Warning: Cracks in the glass or vent can lead to gas leaks or carbon monoxide buildup. If you spot any damage, call a professional immediately.

Many homeowners ask, “How do I inspect my gas fireplace for damage?” Start by checking for cracks, discoloration, or debris, and use a flashlight to see hard-to-reach areas.

2. Test the Ignition:

  • What to Do: Make sure the pilot light ignites smoothly. If it doesn’t, there may be an issue.
  • Warning: If you smell gas while testing, turn off the gas supply instantly and call a professional. Gas leaks are alarming and require immediate attention.
  • Tip: If the pilot light doesn’t stay lit, it could be due to a faulty thermocouple, which may need replacement.

A common question is, “Why won’t my gas fireplace pilot light stay on?” The issue could be a dirty thermocouple or a gas supply problem.

3. Clean the Glass:

  • What to Do: Use a non-ammonia cleaner to keep the glass clear and soot-free.
  • Tip: Mix vinegar and water for a natural cleaning solution for stubborn stains. Apply it with a soft cloth for avoiding scratch the glass.
  • Warning: Avoid abrasive cleaners, which can scratch the glass and reduce its clarity.

If you’re wondering, “What’s the best way to clean gas fireplace glass?” use a non-ammonia cleaner or a vinegar-water mixture for a streak-free shine.

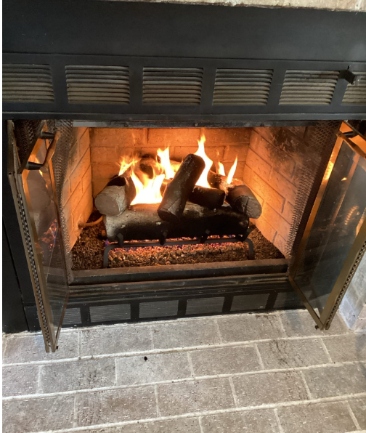
A fireplace

Annual Maintenance (Professional Service)

1. Check the Gas Lines:

  • What to Do: A professional should inspect for leaks or corrosion in the gas lines.
  • Stat: The National Fire Protection Association (NFPA) recommends annual gas line inspections to prevent leaks and ensure safety.
  • Tip: Ask your technician to use a gas leak detector for accurate results.

Many people ask, “How often should gas lines be inspected?” The answer is at least once a year to prevent leaks and ensure safe operation.

2. Clean the Burner and Logs:

  • What to Do: Dust and debris can block the burner. A pro will clean it thoroughly to ensure proper combustion.
  • Example: A homeowner in Fredericksburg noticed their fireplace wasn’t heating properly. The technician found a clogged burner and fixed it in minutes.
  • Tip: Regular cleaning prevents blockages that reduce efficiency and can lead to uneven heating.

If you’re asking, “Why is my gas fireplace not heating properly?” the issue could be a clogged burner or dirty logs.

3. Inspect the Venting System:

  • What to Do: Proper airflow is crucial. The technician will ensure there are no obstructions in the venting system.
  • Tip: Birds’ nests or leaves can block vents, so check them regularly, especially after storms.
  • Warning: Blocked vents can lead to carbon monoxide buildup inside your home, which is extremely dangerous.

A common question is, “How do I know if my gas fireplace vent is blocked?” Signs include weak flames, soot buildup, or a strange odor.

4. Test Safety Features:

  • What to Do: Carbon monoxide detectors and shut-off valves should be checked to ensure they work.
  • Warning: A malfunctioning CO detector can put your family at risk. Replace the batteries annually and test the detector monthly.
  • Tip: If your fireplace has no built-in CO detector, install one nearby for added safety.

Many homeowners ask, “How often should I test my carbon monoxide detector?” The answer is monthly, with battery replacements at least once a year.

Seasonal Preparation

Before Winter:

  • What to Do: Schedule a professional inspection and cleaning to ensure your fireplace is ready for the cold months.
  • Tip: Book early! Technicians get busy as winter approaches, so schedule your service in the fall.
  • Example: A homeowner in Spotsylvania waited too long to schedule service and had to go without their fireplace for weeks during a cold snap.

If you’re wondering, “When should I service my gas fireplace before winter?” the best time is in the fall, before the heating season begins.

Signs Your Gas Fireplace Needs Immediate Service

Don’t ignore these red flags. Addressing them quickly can prevent costly repairs or dangerous situations.

1. Unusual Smells

  • What to Watch For: A rotten egg odor (added to natural gas for detection) or a burning dust smell.
  • Why It’s Serious: A gas leak can lead to explosions or carbon monoxide poisoning.
  • Action Step: If you smell gas, turn off the gas supply, open windows, and call a professional immediately.

2. Yellow or Flickering Flames

  • What to Watch For: Flames that are yellow instead of blue or that flicker inconsistently.
  • Why It’s Serious: This indicates improper combustion, which can produce carbon monoxide.
  • Action Step: Turn off the fireplace and schedule a service call to inspect the burner and venting system.

3. Soot Buildup

  • What to Watch For: Black soot on the glass, logs, or surrounding area.
  • Why It’s Serious: Soot indicates incomplete burning, which can clog the burner and reduce efficiency.
  • Action Step: Clean the affected areas and have a professional inspect the burner and gas pressure.

4. Difficulty Igniting

  • What to Watch For: The pilot light won’t stay lit, or the fireplace takes multiple attempts to ignite.
  • Why It’s Serious: This could signal a faulty ignition system, thermocouple, or gas supply issue.
  • Action Step: Check for debris around the pilot light. If the problem persists, call a technician.

5. Strange Noises

  • What to Watch For: Popping, banging, or whistling sounds when the fireplace is on.
  • Why It’s Serious: These noises can indicate airflow issues, gas pressure problems, or loose components.
  • Action Step: Turn off the fireplace and schedule a service call to diagnose the issue.

DIY vs. Professional Service – What You Should Know

Understanding when to DIY and when to call a pro can save you time, money, and stress.

DIY Tasks

1. Cleaning the Glass:

  • Use a non-ammonia cleaner and a soft cloth to remove soot and stains.
  • Tip: Clean the glass when the fireplace is cool to avoid streaks.

2. Inspecting the Fireplace:

  • Look for cracks, discoloration, or debris in the fireplace and vent.
  • Tip: Use a flashlight to check hard-to-see areas.

3. Testing the Ignition:

  • Ensure the pilot light ignites smoothly. If it doesn’t, there may be an issue.
  • Warning: If you smell gas, turn off the gas supply and call a professional.

When to Call a Pro

1. Gas Leaks:

  • Gas leaks are dangerous and need immediate professional attention.
  • Tip: Install a gas leak detector for added safety.

2. Venting Issues:

  • Blocked or damaged vents can lead to carbon monoxide buildup.
  • Example: A homeowner in Prince William County discovered a bird’s nest in their vent during an annual inspection.

3. Electrical Problems:

  • Faulty wiring or ignition systems can be complex and hazardous to fix.
  • Tip: Always hire a licensed technician for electrical repairs.

4. Annual Inspections:

  • A professional can spot issues you might miss, like hidden cracks or worn-out components.
  • Stat: The Hearth, Patio & Barbecue Association (HPBA) recommends annual inspections for all gas fireplaces.
Gas fireplace

How to Find a Reliable Gas Fireplace Service Provider

Not all technicians are created equal. Here’s how to find the best:

1. Check Credentials

  • Look for licensed, insured, and certified professionals.
  • Tip: Ask for their license number and verify it with your local licensing board.

2. Read Reviews

  • Check Google, Yelp, or Angi for customer feedback.
  • Tip: Look for reviews that mention punctuality, professionalism, and quality of work.

3. Ask for Quotes

  • Compare prices and services before hiring.
  • Tip: Be wary of quotes that seem too good to be true—they often are.

4. Get Referrals

  • Ask friends, family, or neighbors for recommendations.
  • Example: A homeowner in Reston found a trusted technician through a neighbor’s referral.

5. Verify Experience

Tip: Ask how long they’ve been in business and if they’ve worked on similar models.

Choose a technician with experience servicing your specific fireplace brand.

Your Home’s Comfort and Safety Start with OHA!

At OHA HVAC, Plumbing, Chimney and Fireplaces, we’re your one-stop solution for all your home comfort and maintenance needs. From HVAC systems to gas fireplaces, we’ve got you covered.

Why Choose OHA?

  • Expert Technicians: Our licensed and certified professionals are trained to handle everything from HVAC repairs to chimney inspections and gas fireplace maintenance.
  • Comprehensive Services: Whether it’s your heating system, plumbing, roof, or fireplace, we do it all.
  • Transparent Pricing: No hidden fees—just honest, upfront quotes.
  • Customer-First Approach: Your safety and satisfaction are our top priorities.
  • Convenient Scheduling: Book online or call us to find a time that works for you.

Don’t Wait Until It’s Too Late!

A malfunctioning gas fireplace or HVAC system isn’t just inconvenient—it can be dangerous. Let OHA handle your maintenance and repairs so you can enjoy a safe, comfortable home year-round.

Call Us Today or Book Online Now!

Experience the OHA difference—where expertise meets reliability.

FAQs

Q: What services does OHA offer?

A: We provide a full range of home services, including:

  • HVAC: Installation, repair, and maintenance for heating and cooling systems.
  • Plumbing: Leak repairs, pipe replacements, and water heater services.
  • Roofing: Inspections, repairs, and full roof replacements.
  • Chimney & Fireplaces: Inspections, cleaning, and repairs for chimneys and gas fireplaces.

Q: How often should I service my gas fireplace?

A: We recommend annual service for gas fireplaces, ideally before winter. Regular maintenance ensures safe and efficient operation.

Q: Do you service all types of fireplaces?

A: Yes! Our technicians are trained to service gas, electric, and wood-burning fireplaces, as well as chimneys.

Q: How much does gas fireplace service cost with OHA?

A: Our prices start at $190 for basic inspections and vary based on the service needed. We provide transparent, upfront quotes so you know exactly what to expect.

Q: What are the signs my gas fireplace needs immediate service?

A: Watch for:

  • Unusual smells (e.g., rotten egg odor).
  • Yellow or flickering flames.
  • Soot buildup on the glass or logs.
  • Difficulty igniting or staying lit.
  • Call us immediately at  703-213-5161 if you notice any of these signs.

Q: Do you offer emergency services?

A: Yes! We offer 24/7 emergency services for HVAC, plumbing, and gas fireplace issues. Your safety is our priority.

Q: How do I schedule a service with OHA?

A: It’s easy! You can book online through our website or call us at 540-899-6045. We offer flexible scheduling to fit your busy life.

Q: Is OHA licensed and insured?

A: Absolutely. We are fully licensed, insured, and certified to provide HVAC, plumbing, roofing, and fireplace services in your area. Your safety and satisfaction are our top priorities.

A well-maintained gas fireplace is more than a luxury – it’s a safe and efficient way to enjoy winter nights. Use this checklist to keep your fireplace in top shape, and don’t hesitate to call a professional when needed.

Ready to schedule your gas fireplace service? Contact a trusted technician today and enjoy peace of mind all winter long.

Top 15 Things You Should Do for HVAC Maintenance

OHA van and technician

Your HVAC system is a high voltage electrical system that may also have gas or heating oil.  The combination of electricity and gas make the need for proper caution paramount.  There are simple regular maintenance items that can be performed by the homeowner, but there are several items for HVAC Maintenance that should only be done by a qualified technician. The general rule of thumb is this; if you know what you are doing and you are not opening the unit or messing around with the electrical or gas systems, then you are probably fine.  But, when in doubt, call a qualified technician.  Don’t risk damaging your property or hurting someone in your home. 

List of Items to Complete the Spring HVAC Maintenance:

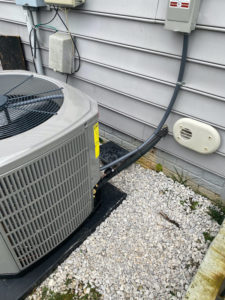
1. Clean the area around the outdoor unit.

Make sure the immediate area around your outdoor unit is free of leaves, sticks, branches & other debris that may have accumulated over the winter months. Anything cluttered around your system could prevent or restrict air flow, reducing the life of your HVAC system or causing it to breakdown or overheat.  If you are outside with a water hose, then take a minute and lightly spray off the outdoor unit, be careful not to use too much pressure as you do not want to bend the fins.  The difficulty of the task is low; this is a good one for the homeowner.

2. Check the condensate line.

Most HVAC units have a condensate line that drains to the outside of the home, make sure the condensate line is not clogged, and the area around the condensate line is clear so water can flow freely. You don’t want to flood your home.  If you notice that the line is partially or fully clogged, then take something long and skinny like a drain cleaner and free the blockage.  Run water through the drain to make sure the obstruction is gone.  The difficulty of this task is moderate for the homeowner to complete; if you are unsure which is the condensate line, then let the technician do this for you.

3. Check the condensate pump.

The condensate pump removes water from the air conditioner when a floor drain is not available.  Check that the condensate pump is plugged into the electrical outlet and operating correctly.  Otherwise, you could end up with a bit of a flood in your house.  Unplug the pump and remove the top of the housing. Clean the reservoir section, sterilize with bleach, and reassemble the pump; this will keep sediment and algae from plugging up the pump.

4. Change the air filters whenever they are dirty.

Changing your HVAC system’s air filters reduces your energy bills, improves the air quality of your home, and extends the life of your system, it is also a normal part of the HVAC maintenance. Clogged and dirty filters damage your equipment and cause possible malfunctions.  Customers always want to know how often their air filters should be changed, and the real answer is whenever they get dirty.  Check the air filters every month.  We provide free air whistles to our customers. Air whistles make a whistling sound when the filter needs to be changed.  If we have not given you air whistles, just ask our technician the next time he is at your house, and he will be happy to provide them to you, free of charge.  Changing air filters is an easy task for the homeowner to complete if they can safely use a ladder.

5. Check exhaust vent openings.

Exhaust vent openings may have missing, damaged, or clogged screens. Vent pipes are inviting to birds and rodents, particularly in the winter, as well as insects in warmer weather. Broken or clogged vent screens can reduce the efficiency of your furnace as well as your clothes dryer. We do not recommend that homeowners try to replace missing or damaged screens themselves. Not all screening products are created equal, and you could create problems for your furnace or dryer. It is best to contact a technician to install the proper screen. 

6. Open vents in your crawl space.

Opening the vents in your crawl space in the spring will allow outside air to circulate. Fresh air helps to prevent moisture buildup, which could cause mold, mildew, and eventual wood rot. We recommend doing this only before summer humidity starts.  Opening vents is simple for the homeowner to do if they know where the vents are located and do not mind crawling under their house to open the vents.  I don’t like spiders and snakes, so this is not one that I would personally do.

7. Turn off your humidifier when your furnace is not in use.

A humidifier adds moisture to the dry air to make the environment more comfortable, primarily during the winter. An air conditioner removes excess humidity from the moist air we have in Summer. If you don’t turn off your humidifier, then your air conditioner will not cool and dehumidify your home correctly, causing your HVAC system to work harder and increase your utility bills.

8. Turn off the pilot light to your gas fireplace.

You don’t use your fireplace in the summer, so why waste the money on fuel? The pilot light may seem small and insignificant, but it does produce heat. The last thing you want in your home in the Spring and Summer is more heat, especially when you are running your air conditioner. Aesthetically speaking, the longer the pilot light is lit, the more soot will build upon your fireplace’s glass front.  The additional benefit is that you will also save money by not burning gas.  I caution homeowners about touching the gas controls.  If you are comfortable doing this and have experience doing it, then be safe, otherwise, have a technician do it for you.

9. Turn off the propane at the tank.

If your fireplace runs on propane, and it is your only household appliance that runs on propane, then turn off the propane at the tank.  If you have other household appliances that run on propane, then you cannot turn off the propane tank.  If you are comfortable turning off the propane tank, then this is an easy task, but if you are unsure, let the technician do it for you.

10. Open the windows to let fresh air into your home.

If you do not suffer from spring allergies, open the windows on breezy days. Bringing in the fresh air of spring can help eliminate closed-up winter stuffiness and drive out unpleasant odors that may have accumulated in your home. Make sure your window screens are in good condition, so you don’t allow bugs to come in on the breeze. Adjust your thermostat so that your HVAC system doesn’t come on while your windows are open.

11. Set the thermostat for the season.

Make sure that your thermostat is set correctly for the season.  If you have a programmable thermostat, then you may not have to worry about this once you have the thermostat set properly.  If you have an old-style thermostat, it may make sense to look at purchasing a programmable thermostat as they save energy and money.  They are also able to keep your home more comfortable than most traditional thermostats as programmable thermostats have more settings and are automated.  Adjusting the thermostat is something most homeowners can do without a technician.  Programmable thermostats can provide energy savings and allow for remote control of the unit through a smartphone.  There are even programable thermostats that will enable your HVAC company to monitor the status of your system.  If the company notices a problem, they can fix it; often before you are even aware, there was an issue.

12. System freezing or producing ice.

If the system is freezing over or producing ice, then your technician is going to check to make sure that your unit has the proper amount of refrigerant.  If the system is low on refrigerant, then the technician will check for leaks and add the necessary amount needed and check the performance of the system.  If you have an older system that uses R-22, then the technician will discuss options available to you.  R-22 is a type of refrigerant no longer legally produced in the USA, and the use of R-22 is severely restricted.  The EPA has designated R-22 as environmentally dangerous.

13. Check the electrical components of your system.

Your technician will check the electrical components of the system to make sure they are operating correctly.  If the technician notices any broken, frayed, or heat worn (melted) components, then the technician will suggest replacing the necessary parts as these issues can have an increased risk of causing a fire or breaking down.  Often, when a component fails, it has a wearing effect on other parts that are attached to it.  Your technician will check the parts that are attached to the failed component for wear and tear.  Because this deals with the electrical system, this is not an item that homeowners should address.

14. Check the furnace.

The technician will check your furnace to make sure there are no signs of gas leaking, rusted parts, or broken heat exchangers.  Leaking gas is an obvious fire hazard and should be fixed immediately.  Rusted parts and cracked heat exchangers can have an impact on the safety of the equipment and its operation.  Cracked heat exchangers and leaking gas are items that the technician will need to service for you.

15. Belts, pulleys, and parts.

During the HVAC maintenance, the technician will inspect belts, pulleys, and parts to make sure they are not worn and in jeopardy of failing and use a proper lubricant on all necessary components.  If belts, pulleys, or pieces show wear, the technician will discuss options to fix or replace where appropriate as well as check the parts that are attached to the worn part to make sure there has not been any collateral damage.

Remember to only do the items that are within your skill level, comfort zone and are safe for you to do.  A good HVAC company will be more than happy to do all of these for you when they perform the HVAC maintenance. Schedule services with us by calling 703-213-5161.

An Air conditioner unit

It Was a Pleasure Serving You!


×